Planning a home extension is exciting, it’s your opportunity to create more space, improve your lifestyle, and add value to your property. But what actually happens once you’ve said “yes” to the project?
In this blog, we walk you through the typical steps of a domestic extension in the UK, from initial design to final handover, so you know exactly what to expect.
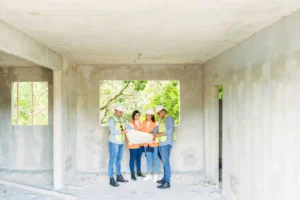
1. Initial Consultation and Feasibility
Before the design even begins, you’ll usually start with a free site visit or consultation with an architect, builder, or design & build firm. They’ll discuss your needs, assess the space, and advise on feasibility.
You’ll discuss:
- Your goals for the space
- Any planning constraints (e.g. conservation area)
- Budget expectations
- Timescales
Tip: Bring photos, rough sketches, or inspiration to help explain your vision.
2. Design & Drawings
Once you’re ready to move forward, you’ll enter the design phase.
This includes:
- Measured site survey
- Concept drawings
- Revisions to the design based on your feedback
- Detailed architectural plans for planning submission and construction
Professionals involved:
- Architect or architectural designer
- Possibly a structural engineer (especially if removing walls or altering rooflines)
If you’re using a Design & Build firm, these stages may be integrated with the build contract.
3. Planning Permission or Permitted Development
Depending on your project, you may need to apply for planning permission. Many extensions fall under Permitted Development, which doesn’t require formal approval, but there are strict limits.
🔗 Use the Planning Portal to check.
Typical planning steps:
- Submit planning application or lawful development certificate
- Wait 6–8 weeks for council decision
- Respond to any neighbour objections or amendments
If you need a Party Wall Agreement, this will also be handled at this stage.
4. Building Regulations Approval
Separate from planning permission, Building Regulations ensure the extension is safe and compliant with legal standards.
Two common routes:
- Full Plans application (preferred for complex builds)
- Building Notice (simpler projects, quicker process)
You’ll usually need:
- Structural calculations
- Drainage plans
- Fire safety and insulation details
Learn more about regulations here: Approved Documents
5. Groundworks and Foundations
Now the construction begins!
Your builder will:
- Clear the site and mark out the build
- Dig and pour foundations (and get them inspected)
- Install drainage and services rerouting (if needed)
This stage can take 1–3 weeks depending on ground conditions and weather.
6. Superstructure and Roofing
With the foundations done, you’ll start to see your extension come to life.
This includes:
- Building walls (brickwork or timber frame)
- Adding insulation and structural supports (e.g. steels)
- Installing the roof structure and tiles
- Windows and doors (if ready)
At this point, the building becomes “weather-tight.”
7. First Fix: Electrics, Plumbing, Heating
Before walls and ceilings are plastered, tradespeople will run:
- Electrical cabling
- Plumbing pipes
- Heating and ventilation systems
- Underfloor heating (if applicable)
This is often referred to as the “first fix.”
8. Internal Finishes (Second Fix)
Now your space starts to feel like a real room.
- Final electrics (sockets, lights) and plumbing fixtures
- Plastering and decorating
- Flooring installation
- Fitting kitchens, bathrooms, or storage
9. Final Inspections and Snagging
Once the work is complete, your builder will:
Make final adjustments and tidy the site
- Conduct a final Building Control inspection
- Provide completion certificates
- Walk through the space with you and create a snag list (minor corrections)
- Make final adjustments and tidy the site
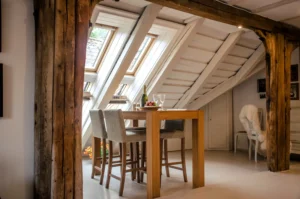
10. Handover and Enjoy!
You’ll now receive:
- Completion documents (incl. Building Control sign-off)
- Warranty or guarantees (if applicable)
- Instructions for appliances or fittings
- A transformed space you can finally enjoy!
If you plan to sell in future, keep all paperwork in a safe place.
In Summary: A home extension typically takes 3–5 months.
From breaking ground to handover, depending on scope and complexity, understanding each step in the process, you’ll feel more in control and better equipped to plan your dream space.